Pages

Showing posts with label chocolate. Show all posts

5.31.2016

Google It


There are so many things that warrant questions in our day to day lives.  Like coffee, the highlight of our mornings, the pick me up in our afternoons, and a very Googly substance.


Why do coffee shops that don't sell coffee beans exist?

Why do people care more about organic coffee than shade coffee?

Why is coffee cake called coffee cake if it doesn't actually have coffee in it?

How are sliced almonds made?


You might thing that the last question doesn't really relate to coffee.  But while drinking coffee with one hand and chopping almonds for this coffee cake with the other, my brain slowly turned on and noticed the rough, misshapen pieces jumping all over my cutting board so I had to wonder - how in the world are those perfectly unnatural nuts crafted?


My wonderment turned into a smile because, you're right, the shape of the almonds doesn't really matter in this case.


What's really important is that they are here, in this coffee cake.  A cake whose crafting is easily explained as it was made in the name of nutty, spicy, sweet, cocoa, caramel-y coffee goodness and is filled with actually coffee to make it make more sense.


So go ahead, grab a slice, no questions asked. 


Coffee Coffee Cake

Ingredients
  • 1/2 c oats
  • 1 c whole wheat flour
  • 1/2 c white flour
  • 2 t cocoa powder
  • 3 t cinnamon
  • 1 t nutmeg
  • 1/2 t cardamom
  • 1 T baking powder
  • a pinch of salt
  • 1/2 c brown sugar, or 1/3 c white sugar
  • 1 large egg
  • 1 c coffee* + 3 T coffee grounds
  • 3 T coconut oil
For the topping:
  • Roasted, unsalted almonds, chopped
  • Unsweetened flakes of coconut
  • Cocoa powder
  • Cinnamon

Combine:
  1. Preheat the oven to 375 degrees and line a 9x5 pan with parchment paper.
  2. Dump the oats into the bowl of a food processor and blend on high speed for 15-30 seconds until finely ground.
  3. Add in the flours, spices, baking powder, and salt, then blend again on medium speed for 20-30 seconds until the ingredients are well incorporated.
  4. Add in the sugar and blend for 20-30 seconds until well incorporated, then add the egg, coffee, grounds, and oil.
  5. Blend on low speed/dough setting for 30 seconds until everything is mixed together.
  6. Pour the batter into the baking pan, sprinkle with almonds, coconut, cocoa powder, and cinnamon then bake for 30 minutes or until a toothpick comes out with a few crumbs on it but not dry.
  7. Let cool for 15 minutes then enjoy!

*I made cold brewed coffee for this recipe mainly because I recently shattered my french press and have yet to replace it.  Feel free to use hot brewed coffee but make sure you let it cool before adding it to the recipe or else it may cook your egg.

4.29.2016

Chocolate Cherry Pops


Ah summer, the time of year in which we enter a delicious sun-kissed face-off of ice cream cone handed life in a bathing suit; a rough season for the gym-going, ice-cream loving people of the world.


Of course we would love to subsist off of ice cream in the summer but, understandably, we don't love negating our 5 am workout sessions.  Time to jump on the knock-off-ice-cream-that's-actually-just-sorbet bandwagon!


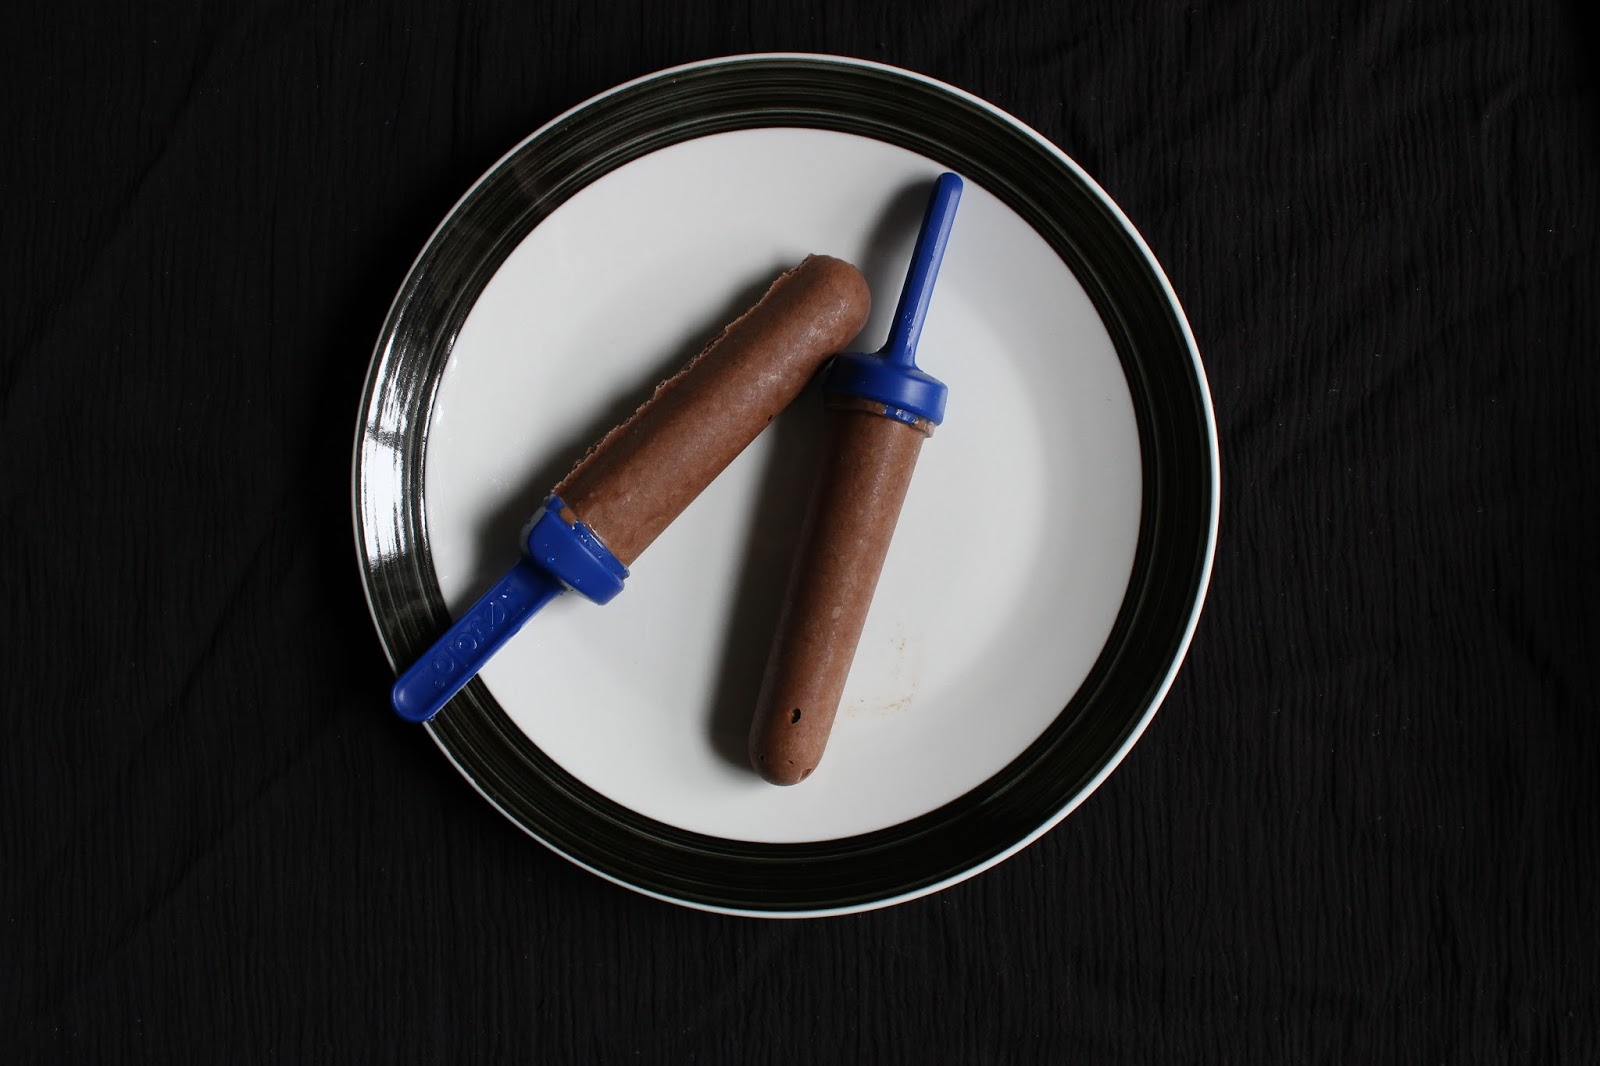
I made my first batch last year in the form of Fudgey Fro-nana Pops that are absolutely to die for. You many never need another recipe ever again, but if you also feel the need to experiment try whipping up some Monkey Pops or a batch of these Cherry Buried Chocolate Pops.  Note that these still contain a banana to keep the consistency like ice cream but if you're one of those banana haters you can still enjoy the recipe by substituting extra cherries and a little bit of Greek yogurt instead!


Cherry Buried Chocolate Pops

Ingredients
  • 1 medium, very ripe banana
  • 2 c frozen cherries
  • Small handful of chocolate chips
  • Small handful of walnuts
  • 1 t vanilla extract
  • 1/2 c vanilla almond milk

Combine
  1. Slice the banana and freeze it overnight.
  2. Using a food processor, blend the frozen banana pieces on high speed until they are very small crumbs, similar to a mince.
  3. Add the frozen cherries and blend for 1 minute on high speed.
  4. Add the walnuts and chocolate chips and blend for 1 minute on medium speed.
  5. Add the vanilla extract and almond milk and blend again until well combined.
  6. Spoon the mixture into a popsicle mold and freeze overnight.
  7. Enjoy!

4.25.2016

Choconana Muffins


There are two types of people in this world: the kind of person who starts every day with breakfast and the kind that doesn't.


As a member of the first group, I would say most of my morning jump starts consist of healthier fare like greek yogurt with fruit and nuts, avocado and eggs, or muesli prepped the night before.


So I'm always mind blown when I see breakfast make it's way to the latter group, as it usually consists of things I would only dream of eating for breakfast but not feel okay eating so early in the day.


Take for example the chocolate muffin.


I've considered this an impostor breakfast food for years but know many a person who will chow one down as a mid-morning "breakfast" without a second thought.


Healthy or not, chocolate for breakfast is every chocoholics dream.  As a member of both the breakfast lovers club and the chocoholics not-so-anonymous group I was tempted to figure out a way to make this "breakfast" desirable before lunch.


Luckily, I possess a pretty healthy banana bread recipe and thought a pretty healthy chocolate version was in order... you know, one that we can all call breakfast worthy.


Choconana Muffins

Ingredients

Dry ingredients:

  • 1 1/2 c wheat flour
  • 1/3 c unsweetened cocoa
  • 1/4 c dark brown sugar
  • 1 t baking powder
  • 1/2 t baking soda
  • 1 t cinnamon
  • pinch of salt
  • 1/2 c walnuts, chopped (optional)

Wet ingredients:

  • 2 lg eggs
  • 1/3 c coconut oil
  • 3 lg bananas, very ripe
  • 1 t vanilla
  • 1/4 c unsweetened almond milk

Combine

  1. Pre-heat the oven to 375 degrees and grease a muffin tin.
  2. In a large mixing bowl whisk together the dry ingredients.
  3. In a small mixing bowl use a large fork to mash the bananas, leaving some chunks if desired, then whisk in the eggs, then whisk in the rest of the ingredients.
  4. Use the fork to mix the wet ingredients into the dry ingredients until well combined but not over-mixed.
  5. Scoop 1/4 cups of the batter into the muffin tin and bake for 12-15 minutes or until cooked through.
  6. Enjoy!

3.25.2016

Mint Chocolate


I hear echoes of my mom's voice when I realize I like something that I hated years ago, she always warned "you're taste buds will change will change when you're older - just wait".


I'm not sure if it's for the better, because I now love things like tomatoes and broccoli, or if it's for the worse because I now love more baked goods, like these minted double chocolate cookies.


Although there are not many children who will say no to chocolate, there is something that comes off as SO reminiscent of a re-purposed tube of toothpaste in a minted baked good.


I honestly think my younger self would even approve of these cookies though.  They've been described as amazing, delicious, and the best cookies ever.  Strangers declared their love for me over them.  So next time you want to mix up a batch of chocolate chip cookies you should also brave the substitutions below, not only to blow your own mind, but also the taste buds of all your cookie testers.


Enjoy!


Minted Double Chocolate Cookies

Dry Ingredients:
  • 1 c wheat flour
  • 1 c white flour
  • 1/2 t baking soda
  • pinch of salt
Wet Ingredients:
  • 1 stick unsalted butter, softened to room temperature
  • 1 stick of margarine, softened to room temperature
  • 3/4 c dark brown sugar, packed
  • 1/2 c white sugar
  • 2 large eggs
  • 3 oz bittersweet chocolate, melted
  • 1 oz milk chocoalte, melted
  • 2 t peppermint extract
Mix-Ins:
  • 11 oz white chocolate, chips or chunks


Combine:
  1. Line a baking sheet with parchment paper and preheat the oven to 375 degrees
  2. Using a tight-wired whisk, mix together the dry ingredients in a medium sized mixing bowl.
  3. In a separate medium sized metal mixing bowl, use the same whisk to beat the butter.
  4. Add in the sugar and beat until light and creamy.
  5. Add in one egg and beat in until well incorporated, then add the next egg and beat in again.
  6. Place the chocolate in a small bowl and microwave for 15 seconds at a time until it is melted, stirring gently with a fork in between intervals.
  7. Gently fold the melted chocolate into the egg mixture, then gently fold in the peppermint extract.
  8. Partially fold the dry ingredients into the wet ingredients, add the chocolate chips, then mix completely but gently.
  9. Place 1 tablespoon sized pieces of dough about 2-3 inches apart on a baking sheet - these cookies will spread a lot as they cook so you don't want them to be too close together.
  10. Bake for 10-12 minutes, let sit for 1-2 minutes, then transfer to a cooling rack.
  11. Enjoy!

2.17.2016

Keeping it weird


The best 5 minute dinner hack is to rub your meat of choice with your favorite spices of the moment, add some sides, and call it a meal.


Of course, the best spice blends are full of flavor and border on a little weird, because life is too short to have a boring dinner!


This particular blend is like a mole cheat in which a cocoa base is blended with herbs and heat to create warm, intricate layers of flavor that wrap around the chicken as it bakes.


If you're nervous about how well chocolate and spice go with chicken, don't worry, it's not as different as it sounds!  The cocoa flavor is really mild and acts as a blanket to help the spices stand out, but isn't overwhelming in the recipe.  Top it with mango pico and quick-pickled onions, and serve with some cheesy, chile polenta for the perfect week-night meal when you're looking for a delicious sort of different.


Recipe notes:  This was a one tissue meal for me, but if you don't have a high spice tolerance try reducing the chipotle to 1/2 a teaspoon, adding 1 1/2 teaspoons of smoked paprika, and omitting the cayenne completely.  For the chile polenta, cooking the chiles a little longer will ensure that their heat is reduced keeping it enjoyable.


Chocolate Blackened Chicken

Ingredients

For the chicken:
  • 1.5 lbs of chicken breasts
  • 1 1/2 T light, unsweetened cocoa powder
  • 2 t onion powder
  • 2 t chipotle, see notes.
  • 1 t oregano
  • 1 t chili
  • 1/2 t cumin
  • 1/4 t cayenne, see notes.
  • 1/4 t coriander
  • 1 T olive oil
  • Salt as needed
For the salsa:
  • 1 mango, diced
  • 1/2 red bell pepper, diced
  • 1/4 c cilantro leaves
  • pinch of salt
  • 1/2 lime, juiced
For the pickled shallots:
  • 3 small shallots, thinly sliced
  • White vinegar to cover
  • 1 t salt
  • boiling water
For the polenta:
  • 2 small poblano peppers
  • 2 large cloves garlic
  • 3/4 c polenta
  • 2  T oil
  • 3 T cotija
  • 1 can of red beans, rinsed well

Combine
  1. Preheat the oven to 350 degrees and line a baking sheet with parchment paper.
  2. Bring water to a boil.  Put the shallots in a small glass container with the salt, cover with vinegar, then add about 1/2 cup of boiling water and set aside.
  3. Toss together the ingredients for the salsa and set aside.
  4. Stir together the spices for the chicken.  Clean the chicken, drizzle with just enough oil to lightly coat, sprinkle with a little salt on each side, then coat liberally with the spice mix.
  5. Bake the chicken for 15 to 20 minutes until the internal temperature is 155 degrees Fahrenheit, then remove from the oven and let sit for 1-2 minutes.
  6. While the chicken cooks, heat the oil in a small pot with tall sides until in shimmers then add the garlic and peppers and saute for 5 minutes.  Add the polenta to the pot and 3 cups of water, bring to a boil while whisking constantly then reduce to a simmer until most of the water is absorbed.  Stir in the cheese and continue whisking until cooked through adding more water if needed.  Note: the raw polenta will look distinctly spotted, when it is done cooking it will be more uniform in texture and color.
  7. Plate a scoop of the polenta, top with red beans, top with a piece of chicken, garnish with mango salsa and pickled onions, and enjoy!

2.15.2016

Smoke and Chocolate


Brownies were always a staple in my house growing up and my mom's recipe is by far the best.


They come out not too fudgy in the center with a crackly, flaky top and the best sturdy but chewy sides.  The kind of brownies that are milk's dream come true.


As with most of my mom's recipes, although she gives me the exact steps complete with footnotes, alterations, and annotations of every sort, they of course never come out exactly the way she makes them.


Thus, I am forced to make them my own.


I started by making reverting them back to the basic recipe, you know, the one that included the original ingredients like butter instead of apple butter.


Then I made several amazingly unhealthy additions, like substituting bacon fat for the butter.


Then I made them approximately seven times to weed out the "bad" variations and make one perfectly unhealthy batch of brownies.


After all the variations I tried, this recipe includes many, many recipe notes to help guide you on your own brownie adventures:


On flour: 
  • Use white flour to help the flavors of smoke, chocolate, and sugar stand out.
  • Use wheat flour to add some heartiness.
  • Use a mix to get the best of both worlds.

On cocoa powder:
  • A word for the wise - do not use store brand cocoa powder, it's not chocolaty enough.
  • Ghirardelli's 100% unsweetened cocoa powder is one of my favorites for baking.
  • Dutch processed cocoa powders are also a great choice.

On bacon: 
  • Benton's bacon was, of course, the best for adding a smokey flavor but was, of course, the worse for the wallet.
  • Canadian bacon was a huge mistake, it lacked flavor and was too chewy in the actual brownie.
  • Turkey bacon is without a doubt out of the question (don't even go there).
  • A hickory smoked pork bacon with an even fat to meat distribution is ideal.

On fat:
  • 100% bacon fat added the most flavor but tasted a little too.... unhealthy.  It also resulted in a flakier brownie, which is not ideal.
  • 100% butter makes a great fudgy brownie but doesn't achieve the same smokey flavor.
  • If you are making the bacon and the brownies on the same day, make sure you melt the butter to match the liquid bacon fat - this was the best version.
  • If you are making the bacon the day before, use room temperature butter too or re-melt both together.
  • If you use room temperature fats, don't over-whisk them otherwise you will end up with an overly-cakey brownie.


The Unhealthiest Brownies

Ingredients

For the dry mix:

  • 2/3 c wheat flour
  • 1/3 c dark cocoa powder
  • 1/2 t baking powder
  • 1/2 t salt
  • 1 t cinnamon, optional
  • 1/2 c dry roasted macadamia nuts, crushed
  • 3/4 c white chocolate chunks
  • 5 pieces of cooked bacon, chopped

For the wet mix:

  • 1/4 c shortening, margarine, or butter
  • 1/4 c bacon fat
  • 3/4 c dark brown sugar
  • 2 medium eggs + 1 egg yolk
  • 1 t vanilla
  • 2 T water

For the garnish:

  • 1 piece of cooked bacon, chopped
  • 1/2 c white chocolate chips
  • 1 T chopped macadamia nuts

Combine
  1. Line an 8x8 baking pan with parchment paper and preheat the oven to 350 degrees.
  2. Whisk the flour, cocoa powder, baking powder, and salt until uniformly combined.
  3. Whisk in the the nuts, chocolate chunks, and bacon and set aside.
  4. In another bowl whisk the fats and sugar.
  5. Add the eggs and yolk one at a time, whisking well in between.
  6. Add the vanilla and water and whisk again.
  7. Fold the wet and dry mixes together until well combined and pour into the baking pan.
  8. Bake for 20-30 minutes or until a toothpick comes out dry but with some small crumbs on it.
  9. Remove from the oven, then use the parchment paper to carefully pull the brownies out of the pan and onto a cooling rack.  Let sit for 15 minutes until cooled.
  10. Once cooled, melt the white chocolate in a double boiler and drizzle over the top of the brownies.  Sprinkle with bacon pieces and macadamia chunks.
  11. Enjoy!


10.07.2015

Chile Pepper Fest

The other weekend Brooklyn Botanic Garden hosted a Chile Pepper Festival that was exactly as hot as it sounds!


Between feeling my tongue melting out of my mouth, endlessly searching for tissues, and being blissfully immersed in hot-sauce heaven I managed to pick a few favorite must-haves:


1. Jacky's James and Jellies takes the award for best jelly.  The mild is very mild and has a spice level friendly to most mouths.  The hot was HOT, but still flavorful enough to be tasty, making it great for incorporating in recipes (think cheese platter, baked brie, thumbprint cookies, etc.)


2. The Bronx Hot Sauce is definitely the best green hot sauce that I've had in awhile.  It's deliciously spicy with a hint of lime on the finish and comes with the satisfaction of supporting a community!


3. My Mustard Chicken post may not have fully reflected my love for spicy mustard - I am obsessed and will literally eat it on anything!   Holy Schmitt's Homemade Horseradish makes the best I have ever had in my life, it is an absolute must try!  They also make a beet horseradish that magically manages to capture the sweet beet flavor while still keeping the horseradish burn.


4.  Torchbearer Sauces makes not-hot sauces that are deliciously flavorful, and hot-hot sauces that will make you frantic for a tissue.  Despite the claim that Psycho Curry was their most popular sauce of the day, I have to say the Smokey Horseradish was so good I want to eat it daily.  It has a medium spice to it, is loaded with flavor, and has the perfect consistency that means you literally can use it for anything!
5.  The brownie I waited all week for came from La Newyorkina Mexican Sweets and it did not disappoint.  It's soft, fudgey texture held the perfect balance between cocoa and spice with a little bit of smoke for added depth - the only downside was the seeds!


6.  Little Bird Chocolates: the best spicy chocolate I have ever had.  Ever.


7.  Although the spicy chocolates from Raaka Chocolates were not as impressive, especially in comparison to the Little Bird booth next door, the Coconut Milk Chocolate and the Maple & Nib bars are to die for.  Fun fact: you can tour their factory 4 days a week AND learn how to make chocolate from scratch on the weekends - I cannot wait to go!


8.  Whimsy & Spice: pumpkin ginger sandwich cookies - order yours today because yes, they ship nationwide!


8.04.2015

Monkey Pops


Last week's heat was draining and this week's heat is almost an even match.


When it's this hot out there is only one way to save yourself - by eating popsicles.


For a snack, for dinner, seriously whenever.


This particular recipe was made with Ben & Jerry's Chunky Monkey ice cream on the mind.  If you're a fan of their super-under-rated flavor then you will be super in love with this recipe too.  I highly recommend doubling it so you can fill two popsicle trays at the same time!


Monkey Pops

Ingredients

  • 3 ripe bananas, sliced and frozen
  • 1/3 c walnuts or peanuts, crushed
  • 2 T coconut, shredded, unsweetened
  • 1/2 c milk, regular, almond, or coconut
  • 1 t cocoa powder

Combine
  1. Pulse bananas in food processor 2-3 times then crush at high speed for 2-3 minutes.
  2. Add nuts and coconut and blend for 1 minute.
  3. Add almond milk and blend again until well combined.
  4. Remove the blade from the processor and scrape clean.
  5. Using a spoon, swirl the cocoa powder into the mixture then fill a popsicle tray with the mix.
  6. Freeze and enjoy!

7.23.2015

Cranberry Almond Larry Bars


What happens when you take my recipe for cocoa bites and add almonds and cranberries?


Taste buds in pure bliss.


The previous version showcased a super chocolaty product.  This recipe starts with the same chocolate base, ups the vanilla, and substitutes raw almonds to lend a mellow sweetness to the tart microdried cranberries.


What are microdried cranberries you ask?  Imagine if puffed rice was a cranberry.  Literally.


Yes, I only bought them because I was grocery shopping without a list while hungry but no, I don't regret the purchase at all!  They are great in granola and cookies, and could possibly be coaxed down a more savory path - if you can't find them try substituting regular dried cranberries for all or part of the dates and reducing the water to two tablespoons.


Cranberry Almond Larry Bars

Ingredients
  • 1/2 c chopped raw almonds
  • 1 c oats
  • 1-2 T flax seeds
  • 1/4 c unsweetened cocoa powder
  • 1 c microdried cranberries
  • 2 t vanilla
  • ~18 medjool dates (7 oz)
  • 2 T water + 2 T increments as needed
Combine
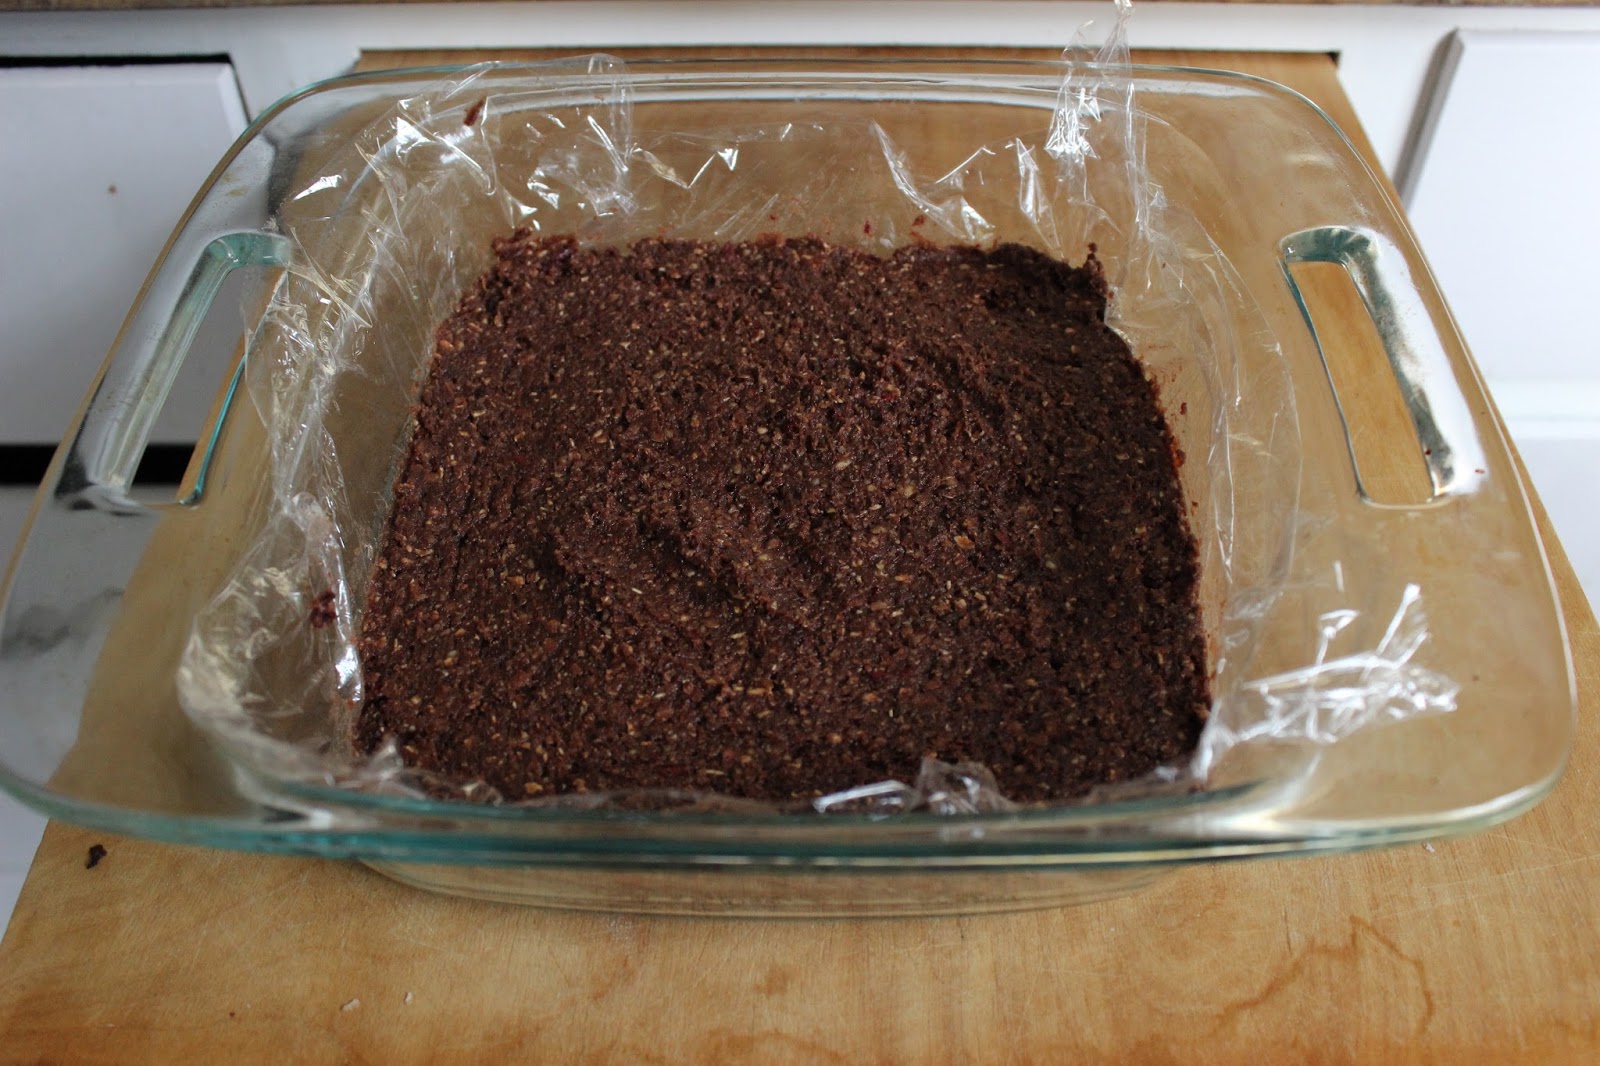
  1. Line a 9x9 clear dish with plastic wrap.
  2. Pulse the almonds, oats, flax seeds, and cocoa in a food processor, then run on medium speed for 2-3 minutes until fine crumbs remain.
  3. Add in the cranberries and pulse twice.
  4. Add the vanilla and dates, pulse a few times, then run on medium speed for 3-5 minutes.
  5. Add the water then run on low speed for 1-2 minutes until the dough clings together.  If you need to add more water, do so in very small increments.
  6. Use a spoon or fork t press the mixture flat into your lined dish and pop in the fridge until cooled, leaving overnight or throughout the day is fine.
  7. Use the plastic wrap to lift the bars out of the dish and onto a cutting board.  Slice into evenly sized bars, cover individually with plastic wrap, then enjoy!

7.06.2015

More S'mores


I think the most fitting contender against the peanut butter-chocolate flavor champion might be the chocolate-marshmallow-graham cracker combo that is s'mores.


S'mores are for sure an underrated dessert.


I think the left over girl scout in me refuses to accept this, as I come across s'mores-inspired recipes I save every single one because they are so worthy.  In fact, I had been sitting on the recipes for these s'mores bars for a little while, waiting to whip them up as the perfect cook-out dessert for the 4th.


Luckily everyone else also thought they were the perfect dessert, so perfect in fact that there were several other versions at the cook out....


Cue awkward moment?  Think again: s'mores are delicious so every single piece of every single version was inhaled.


My version is styled after recipes from Freutcake and from Cookies and Cups, with a little additional help from The Kitchn.  The first version is described as "gooey" but since we want ours to stay together as the perfect little cook out finger food I adjusted the chocolate ganache center to make it thicker and left out the cocoa pebbles.  The second version looks beautiful but used sweetened condensed milk and homemade fluff which I thought was a little time consuming and overly-sweet.  Seriously if you have the time to make your own fluff then bless your soul, but because I know you don't feel free to melt marshmallows over the top instead.


S'mores Bars

adapted from Freutcake  and Cookies and Cups

Ingredients
  • 2 sleeves of plain graham crackers (honey)
  • 2-3 T dark brown sugar
  • 8 oz butter (2 sticks sticks), melted
  • 12 oz half and half or light cream
  • 20 oz bittersweet chocolate chips
  • mini marshmallows
Combine
  1. Preheat the oven to 350 degrees.
  2. Break up the graham crackers into a food processor and add the sugar.  Process on medium speed for 2-3 minutes until you have fine crumbs throughout.
  3. Melt the butter over low heat then add it to the crumbs.  Note: If you have a food processor with a feed hole, leave the processor running and slowly add the melted butter until the crumbs are evenly covered.  If it doesn't have a feed hole you will need to add a little of the butter, run the processor, stop it then add a little more until the the crumbs are evenly covered.
  4. Dump the crumb mixture into two 8x8 square pans.  Use the back of a spoon to level the mixture in the pan, then pack the crumb mixture down.  Make sure you pack this crust down, any cracks will cause it to crumble.
  5. Bake the crust for 10-12 minutes until just turning brown, then let cool completely (even overnight).
  6. In a medium sauce pan warm your cream over low heat until it is just warm to the touch, then whisk in your chocolate until all chunks are completely melted.
  7. Spread the ganache over the completely cooled crusts then cover with marshmallows.  You can either pop the trays back in the oven to melt the marshmallows or be a rebel and wave a grill lighter over them until they are brown on top.
  8. Once the dessert cools use a super sharp knife to cut each tray into 16 squares and enjoy!

6.26.2015

Fudgey Fronana Pops


A long, long time ago when my taste buds were very different and my metabolism much faster, I thought it was a great idea to live off of ice cream during the summer.


There are so many styles and flavors, how could anyone want to eat anything else?
Several cavities and increased pants sizes later - I understand.


When I stumbled across this recipe for "fro-nana" I once again thought to myself that eating "ice cream" each day would be possible.  No added sugars, low fat, lots of flavor, and refreshingly cold - this recipe is a must-make for summer.


Taste it for yourself, let yourself fall in love, then check back later for more adventures in popsicle making!


Fudgey Fro-nana Pops

Ingredients
  • 3 ripe bananas
  • 1/3 c unsweetened 100% cocoa powder
  • 2 T natural peanut butter (can substitute 1/4 c whole fat greek yogurt)
  • 1/4 c unsweetened almond milk or light coconut milk

Combine
  1. Peel and slice the bananas then throw into a Ziploc bag or parchment paper lined tupperware and freeze overnight.
  2. Place the frozen bananas into a food processor, pulse a few times to break them up, then "crush" until small and grainy.
  3. Add the cocoa powder, peanut butter, and almond milk, then blend again until smooth, creamy, and resembles the texture of frozen yogurt.  Note: you may need to add more peanut butter or almond milk as necessary.
  4. Spoon into a popsicle mold and freeze until set, then enjoy!

Tips: I used a butter knife to press the mixture into the mold; also running the mold under hot water for a few seconds makes it easier to remove the popsicle when you are ready to enjoy it!


6.23.2015

Flakes of salt


I have never purchased pink Himalayan sea salt.


I do not own novelty sea salt grinders.


I love a good drink but I still don't even own rim salt for margaritas.


In general I dismiss bourgey food fads and let them pass by without a second thought.


But....the most recent salt craze is one I had to drop my guns and fall for.


Although salted caramels and chocolates are by no means new flavors, they are ones that have become more common over the years and the influx of tantalizing sweet-salty recipes on my Pinterest feed overwhelmed me until I caved...


I regained consciousness in Whole Foods scrutinizing containers of $15 salts until I finally settled for an $8 "knock-off" of Maldon Sea Salt Flakes.  The only thing I have to say in regards to my behavior is sorry, not sorry.  The recipe below ended up being a huge hit with everyone who tried it, which includes the pickiest eater I know who referred to the recipe as "genius".


Here's what you need to know about salt so you can try this recipe for yourself:

  • Regular table salt is salty but has very fine crystals.
  • Sea salt is also salty but has coarse crystals that can be teeth-shattering-ly hard - do not put this stuff on your cookies.
  • Fleur de Sel is a French salt that is only harvested by hand, is expensive, and is sold wet.  Yes, wet.  Needless to say I took a pass on it.
  • Maldon Sea Salt is also salty and takes the shape of hollow, thin walled pyramids making it literally beautiful to look at but also delicate enough to sprinkle on a baked good.  The downside is that it is also expensive, its sold in relatively large packages, and some pieces in the container are larger than you would want on a cookie.
  • Cyprus Sea Salt looks the same as the Maldon pyramids so I assume the difference is that it is "harvested" in a different region.  Luckily it was sold in a smaller package than the Maldon so it is the winner mentioned above.


Salted Pistachio Dark Chocolate Chunkies

(recipe adapted from the inside of a Ghiradelli bag, flavors inspired by Two Peas)

Ingredients (makes ~3 dozen)

Wet
  • 1 c butter, melted
  • 2 lg. eggs
  • 2 t vanilla
  • 1 c packed brown sugar
Dry
  • 2 1/4 c flour (I used 1 1/4 c wheat, 1 c white)
  • 1/2 t cardamom
  • 1 t baking soda
  • 1/2 t baking powder
  • 1/2 t salt
  • 1 c pistachios (I used raw, but roasted/unsalted would also work)
  • 1 c chocolate chunks (I used 76% chocolate)
Garnish
  • Sea salt flakes

Combine
  1. Turn your oven on to 350 degrees and line a baking sheet with parchment paper.
  2. Crack your eggs into a large mixing bowl then set aside while you melt your butter over very low heat in a pan.
  3. In a separate mixing bowl whisk the dry ingredients together until they are well combined.
  4. Using the same whisk beat the sugar into the eggs until light in color, then mix in the vanilla followed by the butter.
  5. Pour the dry ingredients into the wet ingredients and fold together until well combined - note: at this point you may question my sanity because this will look more like brownie batter than cookie dough.
  6. Place the mixing bowl in the freezer for a few minutes the roll a tablespoon sized amount into a ball with your hands, place on the baking sheet 2 inches apart, then flatten the top of the ball with the back of the spoon and sprinkle with a little salt.
  7. Bake for 8-10 minutes or until the edges are just starting to turn brown, then transfer cookies to cooling rack.
Note: I only have one baking sheet to my name so I returned the dough to the freezer between batches.  By the last batch the dough should be firm enough that you can leave it on the counter.

4.09.2015

Trying New Things


If you happened to notice the "energy ball" fad that started a few years ago and dismissed it as total madness then this post is for you:


I was right there with you, filled with skepticism and questions as I came across similar recipes that contained added sugars or required a plethora of bulk bin ingredients that would empty our my wallet and wondered: What is the point?  Do these even taste good? How much energy do they actually give you?


Enter: a simple recipe with as little as 5 ingredients and no added sugars.


When I came across this recipe from Triumph Wellness I had to try it and you should too because these guys are delicious!


Not only are these relatively inexpensive to make, but they are packed with a pure cacao punch to help you avoid the giant bowl of chocolate calling your name from the office break room and they have just enough naturally occurring sugar, protein, and caffeine to help you survive the day without your sugary afternoon granola bar.  Snacking on one also turns out to be a great way to get a boost of energy that won't weigh you down during your post-work gym sesh, so drop that fun-sized Hersey's and grab one of these instead!


Cocoa Balls

Ingredients
  • 1 c raw, old fashioned oats
  • 1/2 c raw walnuts
  • ~15 dates
  • 1/3 c unsweetened cocoa powder
  • 1 t vanilla
  • 1-4 T water
Optional
  • 1 T flax or chia seeds
  • unsweetened coconut or cocoa powder for coating
Combination
  1. Blend oats, chia seeds, and nuts in food processor for 2-3 minutes until finely ground.
  2. Add the dates, cocoa, and vanilla to the processor and blend for another 2-3 minutes. Note: you may have to blend this in 1 minute intervals so you can scrape down the sides of the bowl.
  3. Add the water 2 tablespoons at a time and pulse.  The dough is ready when it is pulling away from the bowl into a large clump.
  4. Roll the dough into 1 - 1 1/2 inch sized balls.
  5. Optional: toss in unsweetened cocoa powder or coconut.
  6. Store in an air-tight container in the fridge until you are ready to enjoy!


3.19.2015

A Cupcake for Any Day


I have a confession to make: I am a pin-crazed, blog-addicted, recipe chaser.


You all know what I mean, it starts with a whim to get some recipe-inspo then 1,000 pins and 100 open browser-tabs later you realize it's been 3 hours and you still have no clue what's for dinner!

Or worse.

You see an upcoming holiday and are determined to make The Best Holiday Themed Treat you can find because how cute are you?  Three weeks later you realize the holiday is tomorrow and although you have yet to buy a single ingredient your hankering for sweet is still going strong.

Lucky for you this break-out-in-case-of-emergency-recipe will save you any day.


This adapted (cup)cake recipe has layers of flavors that will keep the compliments coming your way while making every taster overlook the fact that it's not exactly relevant to the holiday.  If you happen to dig through your pantry and find some sprinkles that can help your cause, sprinkle away like I managed to do for this "St. Patty's Day" version.

But seriously, stop reading and get baking because this moist, crumbly-in-a-good-way cake is rocking dark chocolate vibes mingled with savory-sweet coffee and caramel and is way too good to save for later!


Any-Day Chocolate Cake

Ingredients 


For the Cake

  • 1 3/4 c white flour
  • 3/4 c white sugar
  • 3/4 c unsweetened cocoa powder
  • 2 t baking soda
  • 1 t baking powder
  • 1 t salt
  • 3/4 c dark brown sugar loosely packed
  • 1 c buttermilk
  • 1/2 c olive oil
  • 2 medium eggs
  • 1 t vanilla
  • 1 c freshly brewed coffee

For the Frosting
  • 1/2 c unsalted butter (1 stick), room temp
  • 2-3 c powdered sugar
  • 1 t vanilla extract
  • 2-4 T almond milk

Combine


For the Cake
  1. Preheat the oven to 350 degrees.
  2. Whisk the flour, white sugar, cocoa, baking soda, baking powder, and salt in a bowl.
  3. In a separate bowl whisk the brown sugar, buttermilk, oil, eggs, and vanilla.
  4. Gently fold the wet ingredients into the dry until just combined, then add the coffee and mix until fully combined.
  5. Use a 1/4 measuring cup to pour the batter into a lined or oiled cupcake tin, and bake for 10-12 minutes or until a toothpick comes out clean.
  6. Remove the cupcakes from the pan and place on a cooling rack.

For the Frosting
  1. Place the butter in a bowl with the vanilla and alternate between gradually adding the sugar and the milk, using a fork to mash together between additions.
  2. Using a handheld or counter top mixer, cream ingredients until fluffy and thick.  You may need to add some more sugar until the consistency is thick.
  3. Fill a ziploc bag halfway with frosting, then snip off a small piece of a bottom corner off at an angle.
  4. Using a slow, circular motion frost each cupcake starting from the outer edge and working your way into the center.