Pages

6.30.2015

Something about Hawaii and Bacon


After following a strictly vegetarian diet for 10 years I am slowly reintroducing meat to my life.


My most recent rediscovery is bacon.


For the few weeks that followed my "first" bite of bacon I literally wanted nothing else.


My heart hates me.


Luckily having your bacon with a side of greens and fruit cancels out the unhealthy effects right?


Probably not.


BUT, this slightly adapted salad from The Kitchn is a good enough justification of that theory, and yes, if you get your Tupperware out you can even pack it up to make your co-workers drool!


Hawaiian Salad

(adapted from The Kitchn)

Ingredients (per salad)
  • a few chunks of pineapple
  • 2 T chopped red peppers
  • 1/2 c chickpeas
  • 2 T dressing, I used an lemon tahini dressing but ranch will work
  • 1-2 slices of bacon
  • 1 big handful of greens
Combine
  1. Start by cooking your bacon by method of choice then setting it aside to let cool.
  2. Toss the greens with your dressing of choice then sprinkle with pineapple, red pepper, and chickpeas,
  3. Chop up bacon and sprinkle on top.
  4. Note: this is a packable recipe, start by putting your dressing at the bottom of a tupperware, then layer in the chickpeas, pineapple, red pepper, bacon, and greens!



6.26.2015

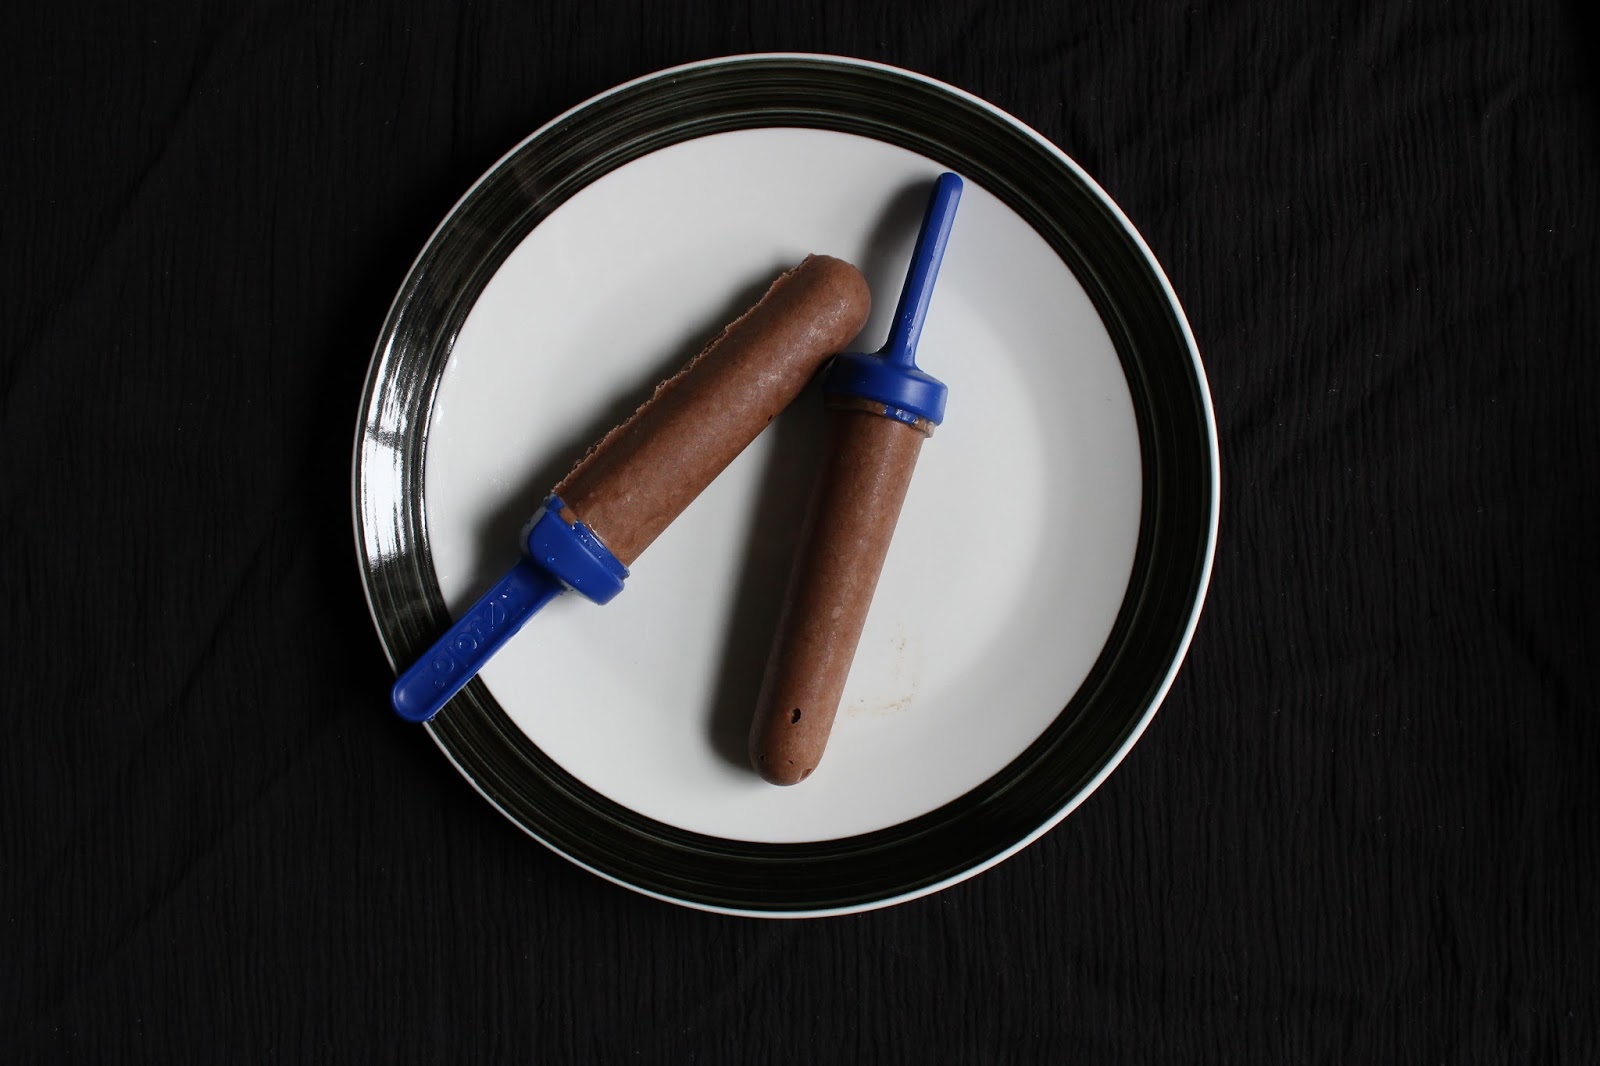
Fudgey Fronana Pops


A long, long time ago when my taste buds were very different and my metabolism much faster, I thought it was a great idea to live off of ice cream during the summer.


There are so many styles and flavors, how could anyone want to eat anything else?
Several cavities and increased pants sizes later - I understand.


When I stumbled across this recipe for "fro-nana" I once again thought to myself that eating "ice cream" each day would be possible.  No added sugars, low fat, lots of flavor, and refreshingly cold - this recipe is a must-make for summer.


Taste it for yourself, let yourself fall in love, then check back later for more adventures in popsicle making!


Fudgey Fro-nana Pops

Ingredients
  • 3 ripe bananas
  • 1/3 c unsweetened 100% cocoa powder
  • 2 T natural peanut butter (can substitute 1/4 c whole fat greek yogurt)
  • 1/4 c unsweetened almond milk or light coconut milk

Combine
  1. Peel and slice the bananas then throw into a Ziploc bag or parchment paper lined tupperware and freeze overnight.
  2. Place the frozen bananas into a food processor, pulse a few times to break them up, then "crush" until small and grainy.
  3. Add the cocoa powder, peanut butter, and almond milk, then blend again until smooth, creamy, and resembles the texture of frozen yogurt.  Note: you may need to add more peanut butter or almond milk as necessary.
  4. Spoon into a popsicle mold and freeze until set, then enjoy!

Tips: I used a butter knife to press the mixture into the mold; also running the mold under hot water for a few seconds makes it easier to remove the popsicle when you are ready to enjoy it!


6.25.2015

Beet the heat


Not long ago, in a little New England bistro, I got a surprise introduction to macerated beets.


Upon first bite it was obvious that something was different: they were too bright and fresh tasting to be roasted, retained a distinctive crunch that would be unobtainable from boiling, yet they are still softer than a raw beet would be...


I looked up at my friend, "How did you make this??"


Apparently soaking beets in vinegar, salt, or sugar (similar to how we sugar berries for a pie) will soften them up to the point that you can enjoy them on a salad without breaking your teeth and without turning on your oven in the mid-summer heat wave.


Sold?


So was I.


The bistro's method is to julienne (ie. match-stick) the beets, sprinkle them with sugar, salt, and pepper, then cover them in vinegar over night.  I omitted the sugar and included lemon juice and zest to add a little flavor but the overall product is the same - simple, edible, summery, heat-free.


Heat-Free Beet Salad

Ingredients (makes roughly 3 large salads)
  • 1 large beet: peeled + grated or julienned (cut into matchstick sized pieces)
  • 1 lemon, juiced + zested
  • 1 t salt + pepper
  • Apple cider vinegar as needed
  • 2 small carrots, peeled + grated or juilienned
  • 1 oz goat cheese, per salad
  • 1 T pepitas, per salad
  • 1 large handful of arugula, per salad
Garnish
  • Olive oil
  • Lemon zest
  • Salt and pepper

Combine
  1. To macerate the beets: dump them into a lidded container with the lemon juice, salt, pepper, and 2 teaspoons of lemon zest.  Cover them rest of the way with vinegar then shake well until the liquids are well combined.  Store in the fridge for at least 4 hours but not more than 8 (soaking them for too long will cause them to lose all their flavor and get too soft).
  2. Sprinkle a bed of arugula with the beets, carrots, goat cheese crumbles, and pepitas.
  3. Drizzle a few tablespoons of the leftover beet vinegar over the salad, then drizzle with a little olive oil, and garnish with lemon zest.
  4. Sprinkle with salt and pepper then enjoy!


6.23.2015

Flakes of salt


I have never purchased pink Himalayan sea salt.


I do not own novelty sea salt grinders.


I love a good drink but I still don't even own rim salt for margaritas.


In general I dismiss bourgey food fads and let them pass by without a second thought.


But....the most recent salt craze is one I had to drop my guns and fall for.


Although salted caramels and chocolates are by no means new flavors, they are ones that have become more common over the years and the influx of tantalizing sweet-salty recipes on my Pinterest feed overwhelmed me until I caved...


I regained consciousness in Whole Foods scrutinizing containers of $15 salts until I finally settled for an $8 "knock-off" of Maldon Sea Salt Flakes.  The only thing I have to say in regards to my behavior is sorry, not sorry.  The recipe below ended up being a huge hit with everyone who tried it, which includes the pickiest eater I know who referred to the recipe as "genius".


Here's what you need to know about salt so you can try this recipe for yourself:

  • Regular table salt is salty but has very fine crystals.
  • Sea salt is also salty but has coarse crystals that can be teeth-shattering-ly hard - do not put this stuff on your cookies.
  • Fleur de Sel is a French salt that is only harvested by hand, is expensive, and is sold wet.  Yes, wet.  Needless to say I took a pass on it.
  • Maldon Sea Salt is also salty and takes the shape of hollow, thin walled pyramids making it literally beautiful to look at but also delicate enough to sprinkle on a baked good.  The downside is that it is also expensive, its sold in relatively large packages, and some pieces in the container are larger than you would want on a cookie.
  • Cyprus Sea Salt looks the same as the Maldon pyramids so I assume the difference is that it is "harvested" in a different region.  Luckily it was sold in a smaller package than the Maldon so it is the winner mentioned above.


Salted Pistachio Dark Chocolate Chunkies

(recipe adapted from the inside of a Ghiradelli bag, flavors inspired by Two Peas)

Ingredients (makes ~3 dozen)

Wet
  • 1 c butter, melted
  • 2 lg. eggs
  • 2 t vanilla
  • 1 c packed brown sugar
Dry
  • 2 1/4 c flour (I used 1 1/4 c wheat, 1 c white)
  • 1/2 t cardamom
  • 1 t baking soda
  • 1/2 t baking powder
  • 1/2 t salt
  • 1 c pistachios (I used raw, but roasted/unsalted would also work)
  • 1 c chocolate chunks (I used 76% chocolate)
Garnish
  • Sea salt flakes

Combine
  1. Turn your oven on to 350 degrees and line a baking sheet with parchment paper.
  2. Crack your eggs into a large mixing bowl then set aside while you melt your butter over very low heat in a pan.
  3. In a separate mixing bowl whisk the dry ingredients together until they are well combined.
  4. Using the same whisk beat the sugar into the eggs until light in color, then mix in the vanilla followed by the butter.
  5. Pour the dry ingredients into the wet ingredients and fold together until well combined - note: at this point you may question my sanity because this will look more like brownie batter than cookie dough.
  6. Place the mixing bowl in the freezer for a few minutes the roll a tablespoon sized amount into a ball with your hands, place on the baking sheet 2 inches apart, then flatten the top of the ball with the back of the spoon and sprinkle with a little salt.
  7. Bake for 8-10 minutes or until the edges are just starting to turn brown, then transfer cookies to cooling rack.
Note: I only have one baking sheet to my name so I returned the dough to the freezer between batches.  By the last batch the dough should be firm enough that you can leave it on the counter.

6.21.2015

Drunken Pasta


Adding veggies to booze covered pasta totally makes it okay to eat the booze covered pasta.


At least that's my mentality when I feast on this and although I don't eat pasta often, this is absolutely my most-made pasta dish.  Not only does it taste delicious while enjoyed on the couch in your pjs, but it tastes equally delicious when consumed at a dinner table with candles and wine and fancy stuff.


A lazy dinner that can double as a man-approved date night, what more can a girl ask for?


As mentioned above, each time I make this meal it's slightly different than the time before because this dinner is extremely adaptive and also is great for emptying out the odds and ends from of the fridge.  Here are some suggested changes:
  • Sub red peppers for the mushrooms - this is best if you also sub two slightly spicy sausages for the chicken
  • Use any green you like, just make sure there is lots of it.  My favs are kale, baby spinach, or swiss chard.
  • Booze that works: white wine, summer beers, lagers.  I was drinking a Sam Summer while making this particular meal so in it went - lemoney and delicious!
  • Any herbs will complement this dish, I usually try to keep it to one or two.  My favs are basil, oregano, or parsley.
  • Bacon is also a great substitute or addition to the chicken (try to refrain from adding a whole pound, two slices per person works)


Some notes:  I usually leave my spices and oil right next to the stove so they are on hand when I need them.  Start by setting your water to boil, then prep your veggies followed by the chicken - this way everything is ready to toss together so you will have less running around to do.  It's also extremely helpful to keep a strainer handy so you can avoid over-cooking your pasta.


Drunken Pasta

Ingredients
  • 3 servings of dry pasta of choice
  • 1 small onion chopped (I use vidalia or sweet)
  • 3 large cloves garlic, chopped
  • 1 pound chicken breast
  • 1/2 - 1 1/2 t crushed red pepper (if you don't like heat start small)
  • 1 t oregano
  • 1 t basil
  • salt and pepper to taste
  • 4-5 T olive oil
  • 8 mushrooms, sliced (or half a red pepper chopped)
  • 1/2 c booze of choice
  • 3-4 cups of greens roughly chopped (I used 3-4 large leaves of kale)
Optional
  • 2-3 lemon slices or a squeeze of juice from half a lemon at the end
  • cheese to garnish

Combine
  1.  Fill a tall-sided pot 3/4 of the way with water and dump in a teaspoon/pinch of salt.  Place over a burner on high heat, once the water is at a rolling boil dump in the pasta and set a timer for the appropriate cook time.  Drain when ready and set aside.
  2. While you wait for the water to boil prep all your veggies then set aside.
  3. Cut any excess fat off your chicken then cut into 2-bite-sized pieces.  Rub with 1 tablespoon of olive oil and sprinkle with a little salt and pepper.
  4. Heat 2 tablespoons of olive oil over medium heat in a large skillet or a large bottomed pot.
  5. Cook the onion for 5-7 minutes until it starts turning clear.  Throw in the garlic and cook for another 2 minutes, keep your eye on it and stir often so the garlic doesn't brown.
  6. Push the onions and garlic to the edges of the pan then place the pieces of chicken in the center and sprinkle with the herbs, red pepper, and optional lemon. When there is approximately one or two centimeters of "white" wrapping around the sides of the chicken you can flip each piece.
  7. Dump in the mushrooms and cook for 1-2 minutes until they start looking juicy, then pour in the booze and let cook for 1-2 more minutes until the alcohol has cooked off.
  8. Toss in the cooked pasta and mix in the greens until they are just starting to soften.
  9. Plate, garnish, and enjoy!